
1979 Fender Stratocaster.
Happy 2013! I have a few posts leftover from the tail end of 2012 that will go up here before I do my "New Year's" post.
Here's a '79 Strat from my boy DaveO from a few weeks ago ...
Strats and other guitars in the single - single - humbucker pickup configuration have always reminded me of the 80's. I'm not sure exactly why or who in particular, but most of those hair bands seemed to require a humbucker in the bridge as a minimum requirement. Nothing wrong with that, just an observation.

Guitar and original pickguard previously modified for a bridge-position humbucker. A new pickguard is required to return this guitar to it’s original single-coil bridge pickup.
The owner of this 1979 Strat bought it with the humbucker already installed. Luckily the original pickup was included in the case. He brought it in to have the guitar returned to the stock bridge pickup, along with new frets and a bone nut. Another consideration is that he wanted to keep the guitar looking as original as possible, so this meant maintaining the character of the original fingerboard's finish.

The bridge humbucker is coming out. Note how the original pickguard was modified to accept the new pickup – not just the obvious enlargement but the original pickup mounting holes.
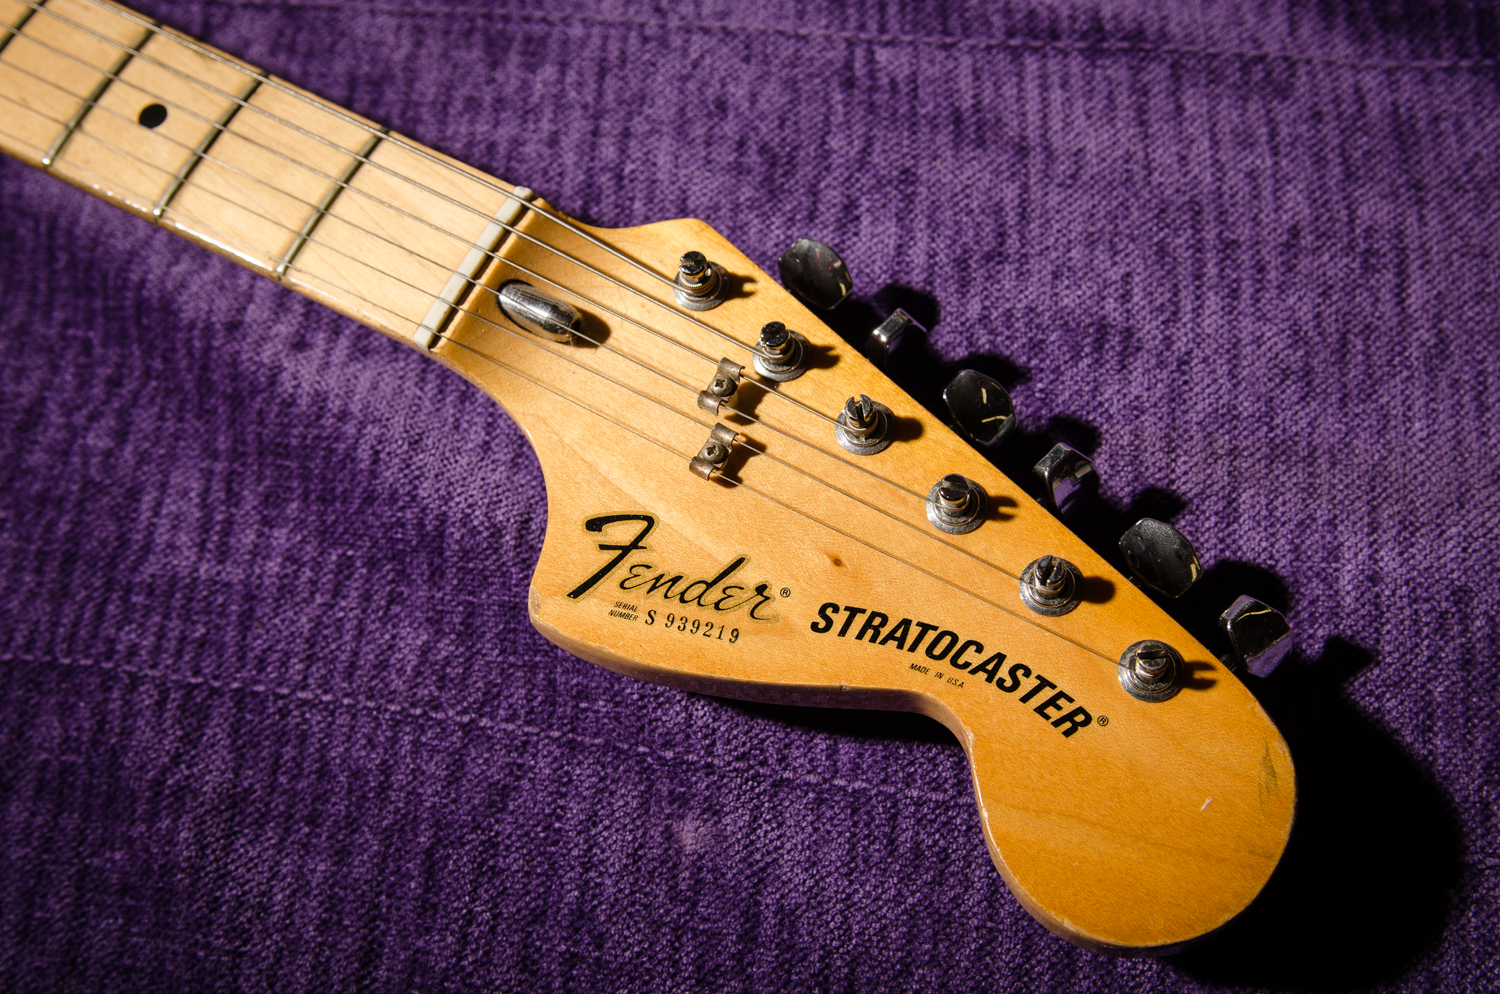
Fender’s large ’70’s peghead. I’m a big fan of these.

Fender’s 3-bolt neck with “micro-tilt” from the 70’s.
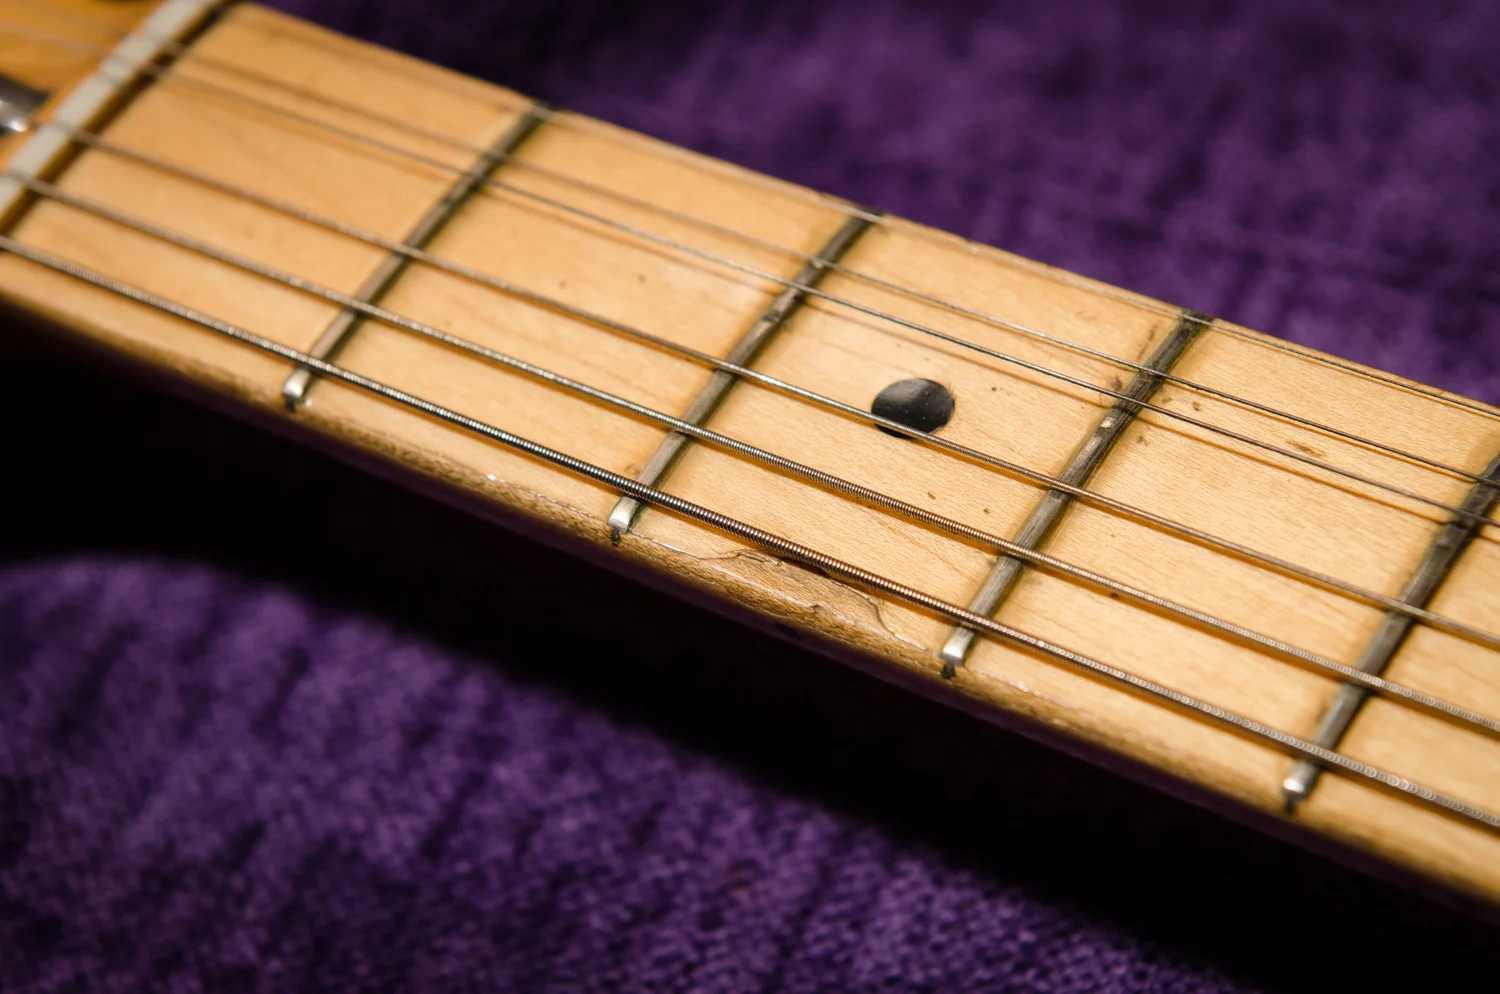
Note the infamous 70’s heavy polyester finish on the fingerboard and how it seals in the frets.
The customer is looking to preserve the genuine wear on the fingerboard, so we will not be stripping and refinishing the fingerboard while refretting this neck.
So here's the plan of attack:
1. Remove the neck and secure the tuner bushings.
2. Remove the frets and nut.
3. Preserve the original fingerboard finish and fill any finish chip-outs and finish sand / buff neck.
4. Install new frets and dress.
5. Make a new bone nut.
6. Swap out old pickguard with the humbucker and install new pickguard with stock pickups.
7. Setup.
: : : : : :
Here we go!

The tuning posts are taped up to prevent the bushings from coming loose and getting lost on the shop floor. Check out this post to see an alternative trick for saving Gibson bushings.

Here’s a view inside the neck pocket. You can see the “micro-tilt” mechanism at the bridge-end.

Underneath the neck heel you see the other half of the “micro-tilt”. Two screws and a bolt, along with other hardware, secures the neck to the body.
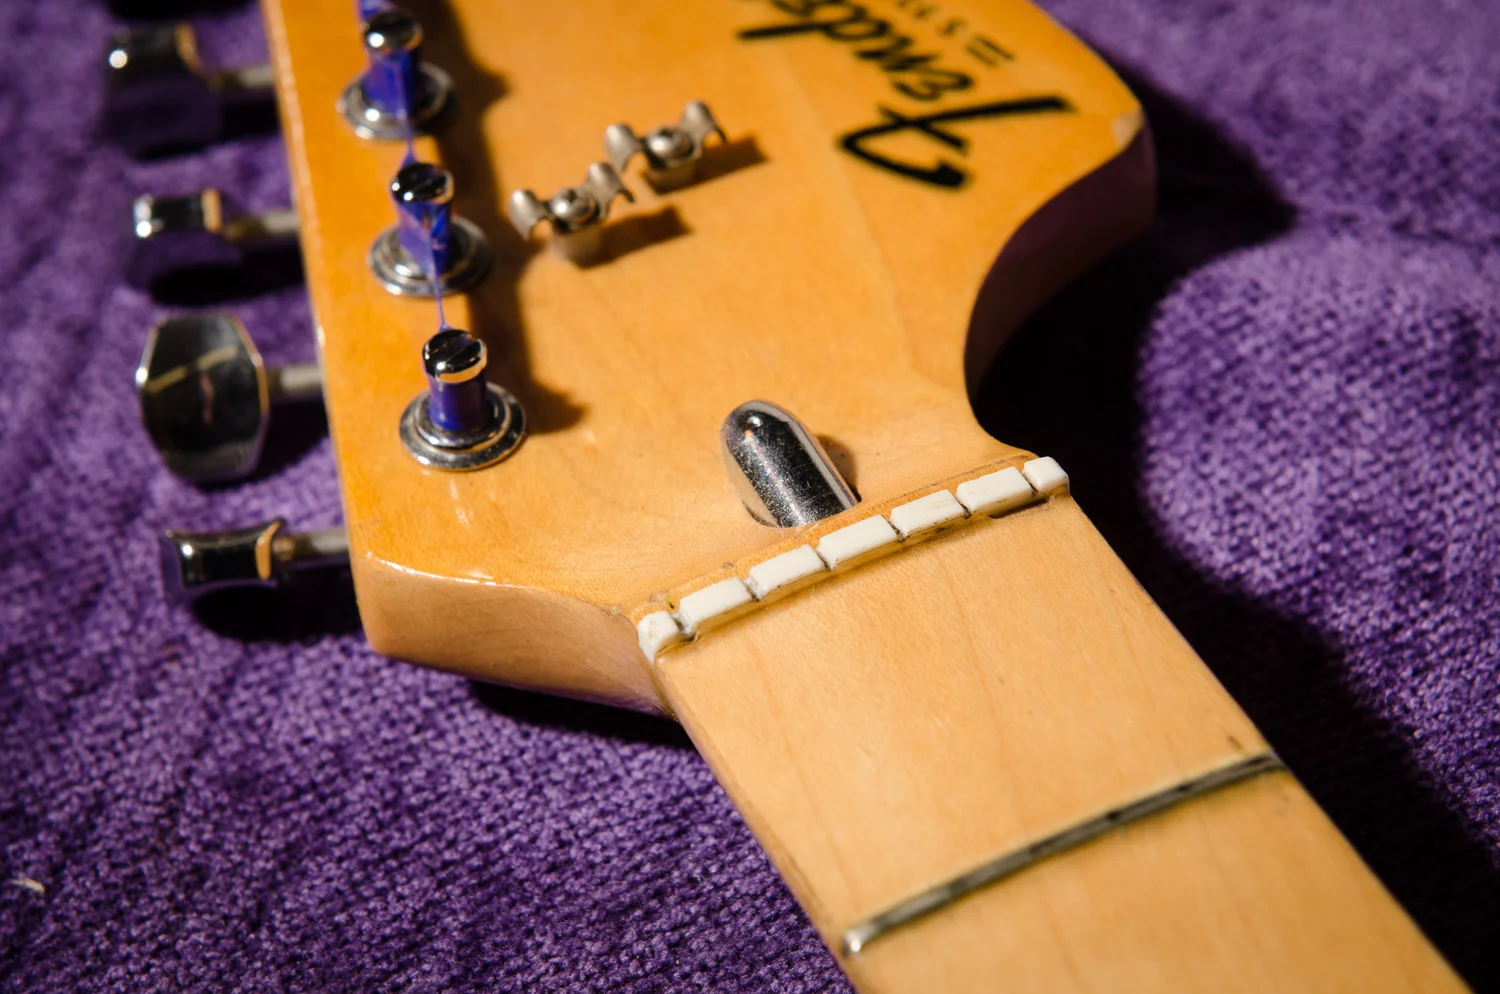
The original nut is buried under the finish and you can see the finish chipping on the treble-side. Scoring the finish with a razor blade will help minimize finish damage as the nut is removed. These never come out in tact, so a new bone nut will be made.

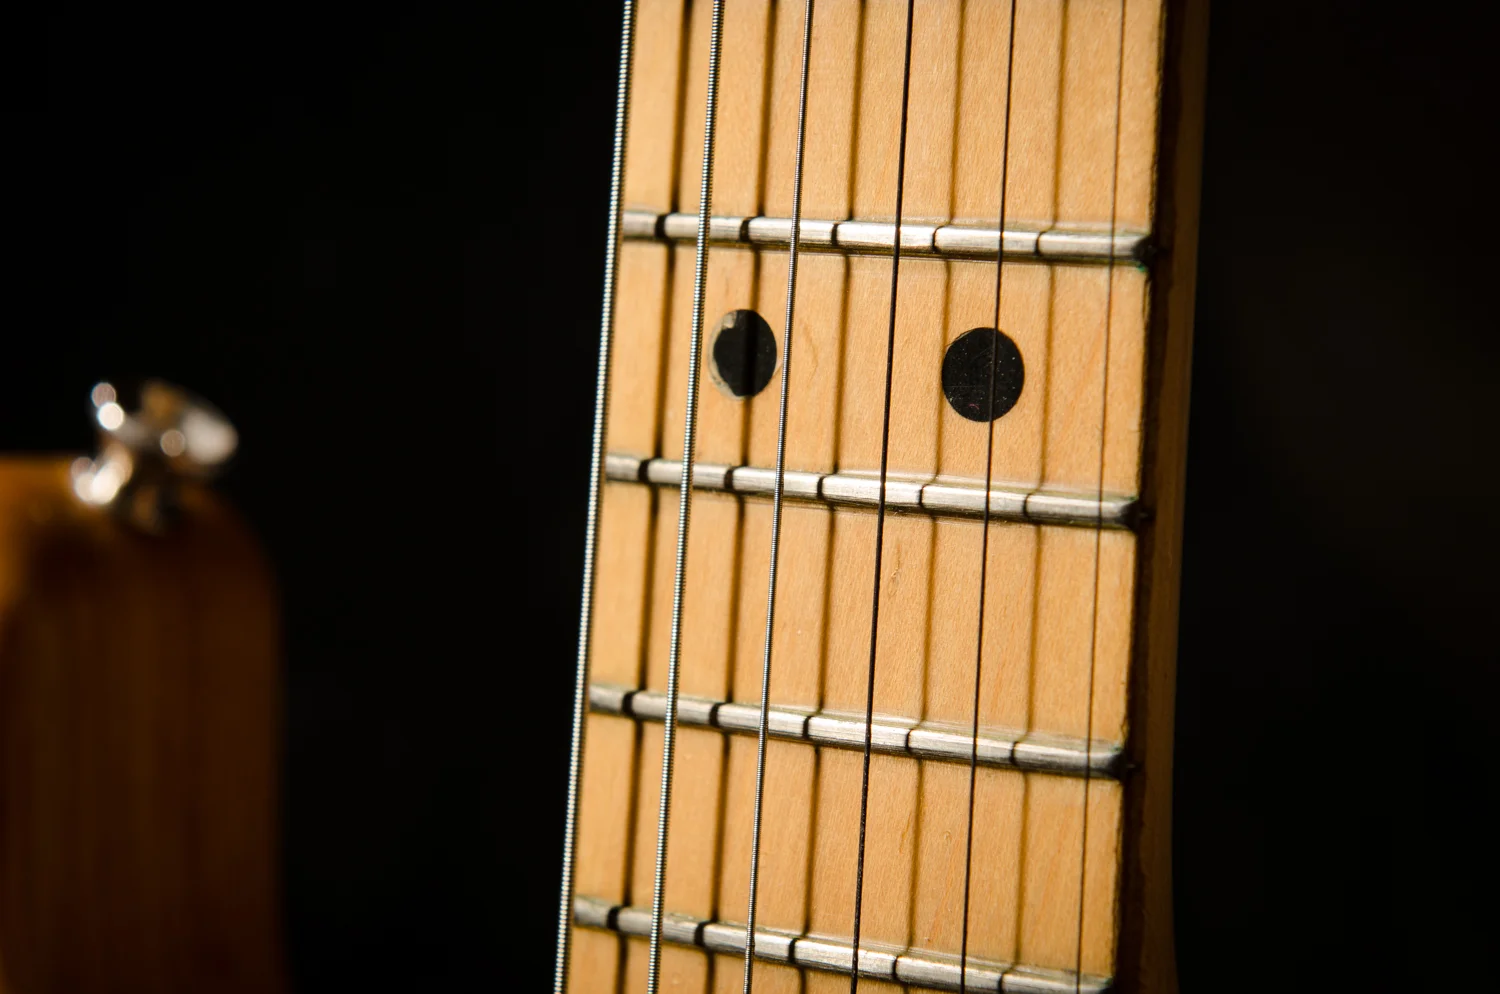
Another view of the fingerboard’s “character” before removing the frets.

The original frets are installed pre-finish, so there is a thick polyester web that seals the frets in. This web needs to be completely cut-through in order to prevent damage to the surrounding fingerboard finish. This is a long and meticulous process to ensure each fret is fully disconnected from the fingerboard finish prior to removal. Another trick is to tighten the truss rod before removing the frets. This springs opens the fret slots slightly to help minimize chip-out.
From Dan Erlewine's book, The Guitar Player Repair Guide, Fender guitars prior to 1982 were fretted sideways. This means that the frets were installed by sliding the frets in from the side of the neck as opposed to pressing or hammering them in to the face of the fingerboard. Some recommend that you need to remove these frets by tapping out the frets sideways with a hammer and a small punch so you do not chip out the fingerboard. In particular, slab-sawn rosewood fingerboards from this era can chip out substantially when not tapped out sideways (so I've heard). 1970's Fender Maple fingerboards have a thick polyester finish that really builds up around the frets. This heavy finish deterred me from sliding the frets out sideways. My thoughts are if I scored the finish around each fret, I could minimize damage to the fingerboard and finish, and be able to remove them with the standard flush-ground end nipper method. I may try the "sideways" fret removal on my next pre-1982 Fender fret job, but this one went fairly well despite the heavy fingerboard finish.

The frets are removed and I have dropped filled any chips in the finish with super glue. Since the finish is so thick, I wet sand the finish in order to attempt to level the fingerboard as much as possible. This allow the new frets to seat as consistently as possible without being able to sand the board itself. I use naptha to wet sand because it evaporates quickly and will not soak in and swell the maple via the fret slots like a water-based lubricant.

The new frets are installed. I am using a higher crown fret in order to allow for more leveling of the playing surface since I could not level-sand the maple fingerboard.

The fingerboard finish is masked off with tape in between the frets to prep for fret leveling, crowning, beveling and polishing.

Another view of the masked fingerboard ready for fret dressing.

The truss rod is adjusted as straight as possible and the frets are level sanded. Note that the body end of the fingerboard is being sanded more than the rest of the board. There is a slight body hump and these frets will have to be sanded a little more aggressively than the others. Not a problem if I was able to sand the maple board itself and properly prep it for frets, but we are keeping the original finish and this is the compromise. Here’s where the higher crown frets help.

The new frets are in, the new nut is installed and the neck is back on the body. Now for swapping out the bridge humbucker for the original single coil pickup.

The bridge humbucker will be disconnected and removed. Then the remaining components are ready to be transplanted to the replacement pickguard.

Here is a view of the modifications that were required to fit a humbucker in the bridge position of the body. Note that the rough edge of the pocket was most likely free-handed with a router (no template used).

Here is a closer view of the pickguard components and humbucker.

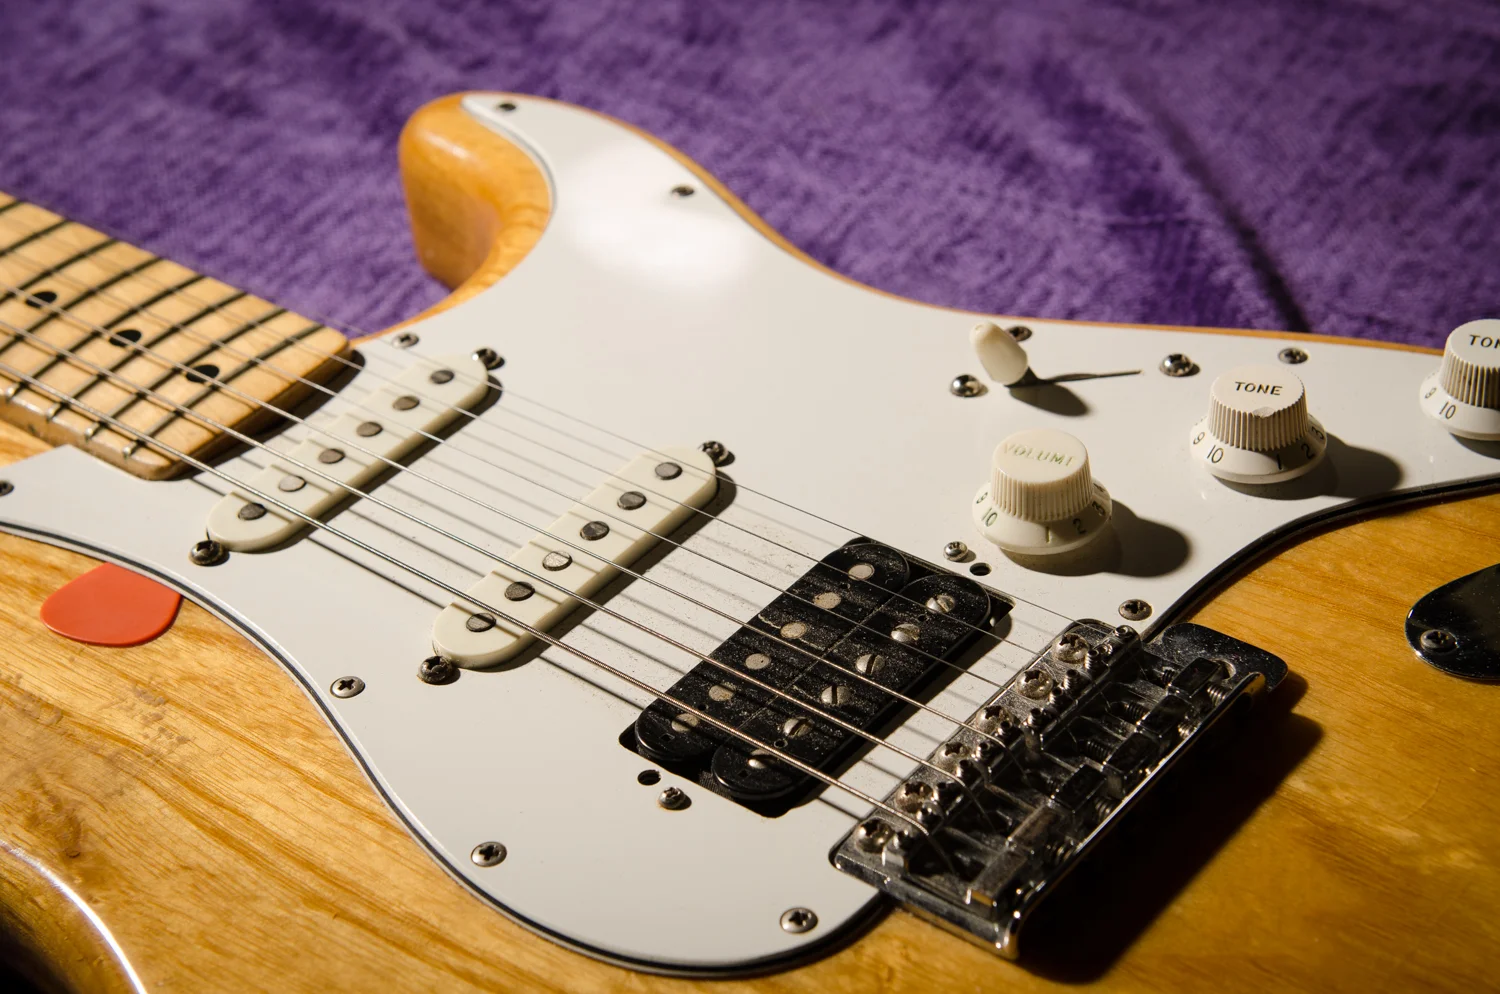
Here is the new pickgaurd loaded with the original components and the bridge single coil back in the mix.

The Strat is now strung up and back to it’s original pickup configuration.
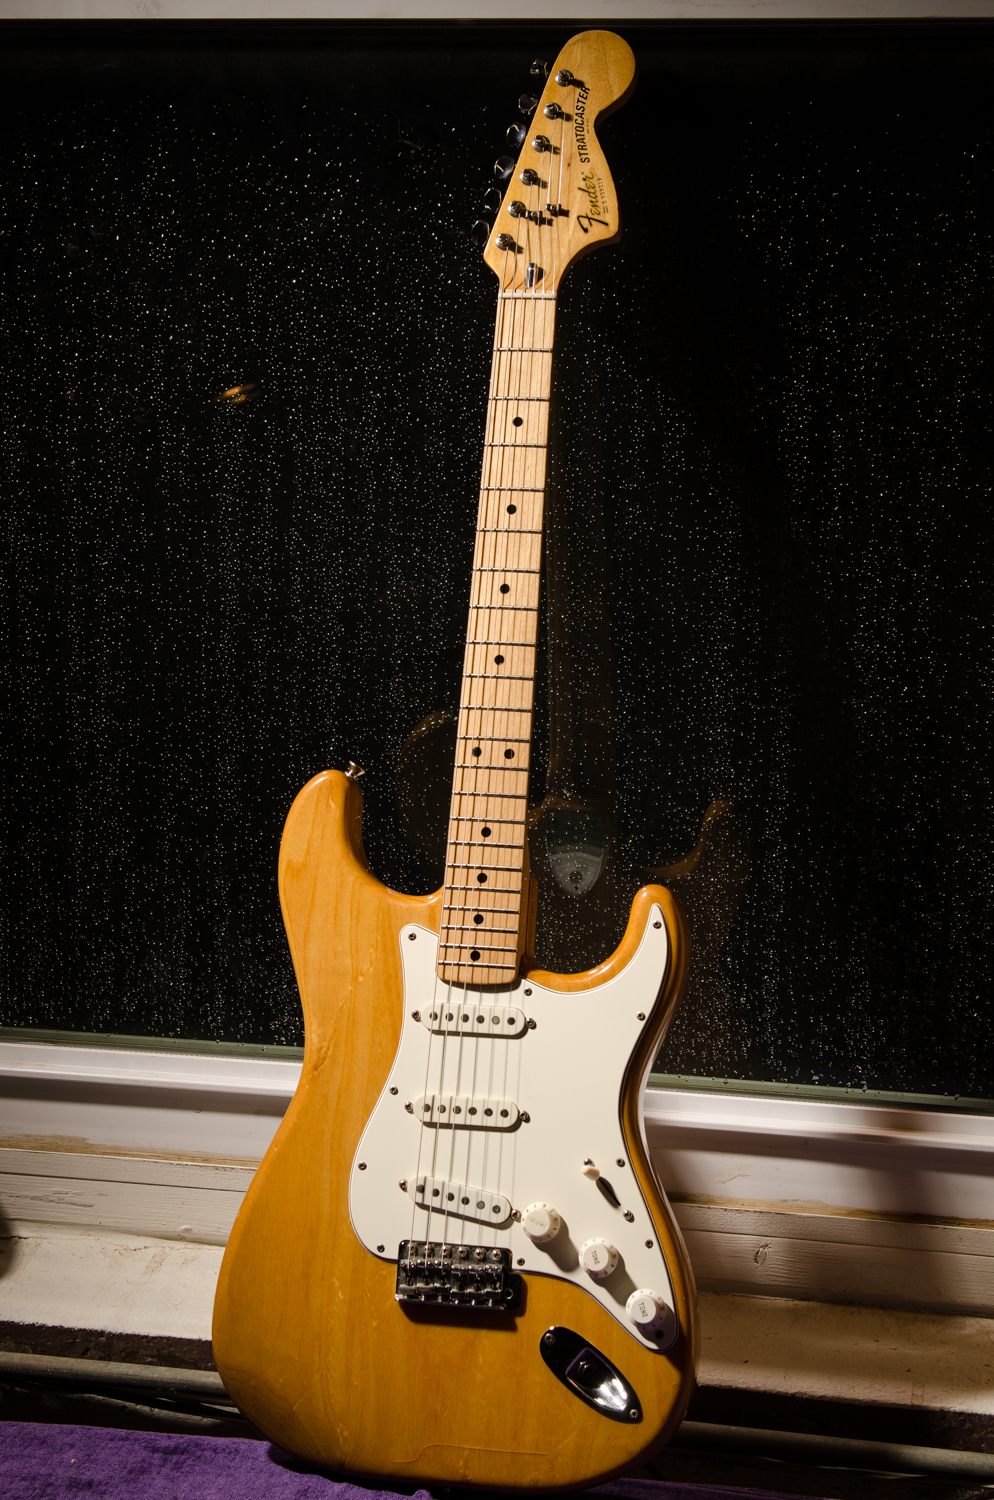
1979 Fender Strat back to it’s stock configuration, now with a new pickguard, frets and a new bone nut. I always love Strat’s 4th position, which is the middle and bridge pickup together – spanky and funky.